Rapidly Building a Backend with AWS Amplify
Saturday, 20th February 2021Amplify
AWS Amplify pulls together a number of key AWS services into one handy plug and play CLI tool. With a few commands, and by answering a set of questions, you can spin up a whole serverless backend in minutes.
I recently ran a tutorial at work on some of the basics of Amplify, and thought I'd share here a brief overview of the things I covered. This post is an overview to give a flavour of what Amplify makes easy and not a full tutorial in itself.
Beer
With an only increasing love of beer (read: dependency) and having taken a foray into the world of home brew, it naturally found its way to being the example I used.
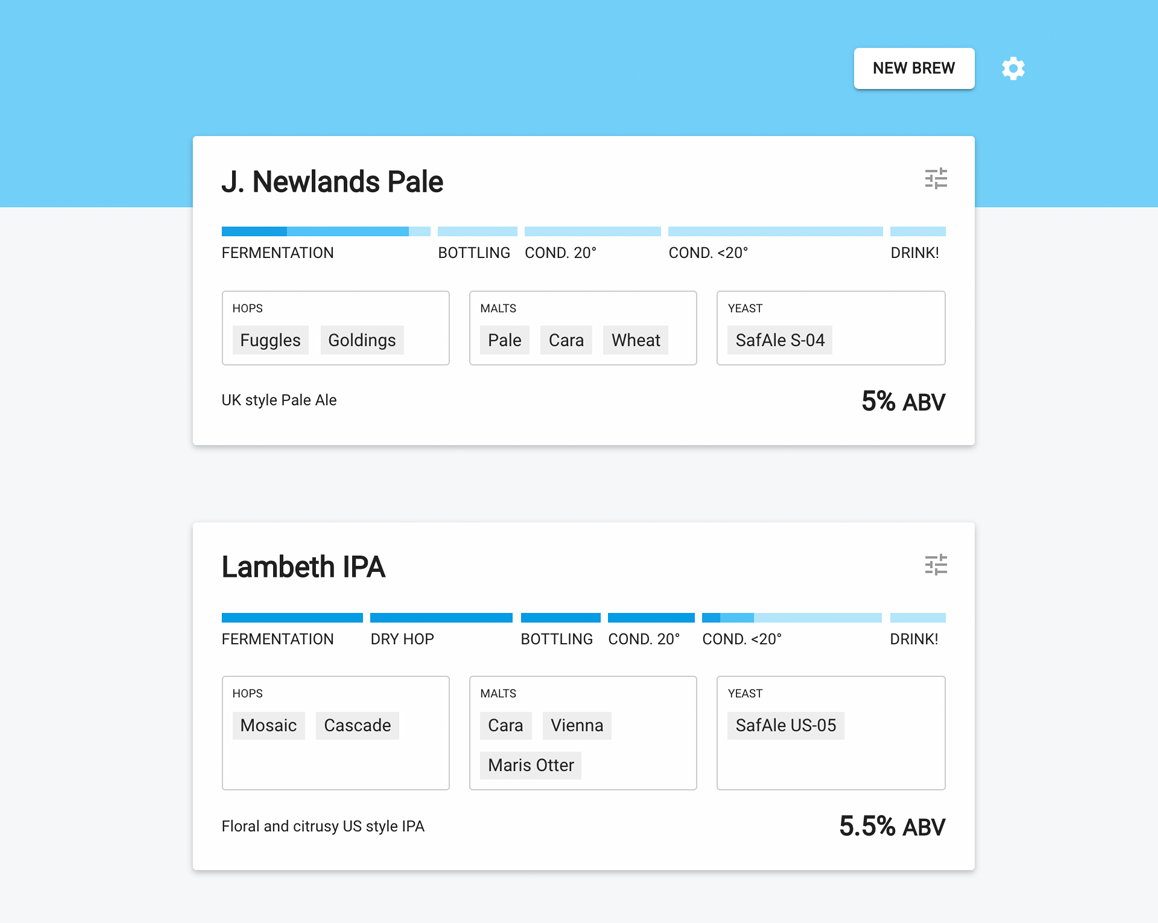
New Brew is a home brew tracker providing a configurable timeline of the key stages after brew day, a record of key pieces of information such as the ingredients used, and push notifications to your phone each time you hit a new stage and have work to carry out. In the following example, I'll briefly cover how I used AWS Amplify to take an entirely offline React interface to a serverless, GraphQL backed web app utilising Cognito, DynamoDB, AppSync, and using Cloudwatch + IFTTT for push notifications. (IFTTT isn't covered by Amplify but is a simple webhook).
Amplify Commands
The main Amplify commands are as follows:
# set up the IAM user you'll be using to push your changes to the cloud
amplify configure

# initialise the project, connect your repo, pick the name, environment, front-end stack etc.
amplify init

# provide a summary of the services you're using
amplify status

# add a service to your project such as hosting, api etc.
amplify add <service>

# push your changes to the cloud
amplify push

# view your Amplify project in the AWS console
amplify console
Setup
amplify init
Amplify not only builds out the backend for you, but it also generates the front-end integration code you'll need. So, once you've run configure and then hit the init step, it'll ask you questions such as which front-end language and framework you're using. It supports a number, including iOS, Android and specifically React in this example.
At any point you can use the following command to see which features of AWS Amplify you're using, and whether the latest changes have been pushed to the cloud. At this point, there'll be nothing - so let's get started!
amplify status
Host Your Frontend
I often like to prototype front-ends entirely offline, using local storage window.localStorage for simple state. It's a great way to build up behaviour and UX without having to worry about a backend. I can focus on project structure and data structure, without needing to spend much time on plumbing.
But once you've got impatient with not being able to use the app across devices, or need some functionality only a backend will bring, it's time to get the app online.
amplify add hosting
This command will quickly have the app hosted. I opted for Amplify Managed with CI connectivity to Github. It'll helpfully create a pipeline for CI/CD and auto-deploy your frontend.
You can run the following to push your changes to the cloud. You'll need to run this often to apply your auto-generated cloudformation that's been created with each Amplify command.
amplify push
Add Authentication
Next up we want to ensure only authorised users are able to access the web app. This will be important when we come to implement the GraphQL API in a moment.
amplify add auth
You can add an off-the-shelf log-in gate just by adding some dependencies and a few lines to your App.tsx. This log-in gate also provides sign up and email verification. The look and feel is configurable.
As this point if you're running your frontend locally, you'll now be able to register, verify your email address, and log in. Alternatively, you can commit, and have the CI pipeline deploy this for you.
Add API
This is where it gets a bit more exciting...
amplify add api
You're asked a series of questions such as what to use for auth (hint: the Cognito Pool just created), and also the type of API you'd like to create. Picking GraphQL and the one-to-many option will then create you an example GraphQL Schema for a blog with posts and comments.
This GraphQL schema is the crucial part underpinning the API structure and DynamoDB persistence layer that will be created when you push.
Edit it to suit your app, Brew and Stage types in my case, and use Directives to signal relationships, rules and more.
type Brew @model @auth(rules: [{ allow: owner }]) {
  id: ID!
  name: String!
  description: String
  startDate: AWSDateTime!
  ingredients: AWSJSON
  abv: String!
  stages: [Stage] @connection(keyName: "byBrew", fields: ["id"])
}

type Stage
  @model
  @auth(rules: [{ allow: owner }])
  @key(name: "byBrew", fields: ["brewID"]) {
  id: ID!
  name: String!
  durationDays: Int!
  startDate: AWSDateTime!
  brewID: ID!
  brew: Brew @connection(fields: ["brewID"])
}
Once pushed, Amplify will ask if you'd like to auto-generate the front-end integration code needed to interact with the API. The answer is probably yes and means you now need to add in only a simple bit of plumbing to switch your app from local storage to the GraphQL API!
amplify push
Push Notifications
Finally, I built push notifications into the app through the creation of a couple of Lambdas, Cloudwatch and IFTTT.
amplify add function
The above creates a Lambda, and by selecting Lambda Trigger and DynamoDB Stream, you can have that lambda triggered each time data is modified in the specified table. I created a Lambda plugged into the Stage table, which takes a given stage start date, and creates a Cloudwatch Rule. This Cloudwatch Rule has a target of another Lambda (also created with amplify add function), which when triggered will then hit IFTTT using a simple HTTP request to their Webhook applet. A push notification will then make its way to your device, assuming you have their app installed.
Like with previous steps, most of the plumbing and access control to set all this up is handled by Amplify, however you do need to manually add the IAM permissions needed to create & modify Cloudwatch Rules. This is a good example of where you hit the limits of what Amplify can bring you, but due to the way it generates Cloudformation, you're able to make the edits you need to achieve your goal.
Tasty Beer
This is a simple example but start to finish it took next to no time at all. Amplify is a great tool if you want to rapidly prototype something, need a backend for a hackday, or are looking to get something to market fast. Right now, it's not something we'll be using at work as we have the capabilities and importantly time, to craft our infrastructure in exactly the way we want (and with Terraform). However, I can certainly see us picking up tools similar to this in future, to empower developers even further.
By the way the beer turned out great, which I can only assume is due in most part to precision brew tracking.